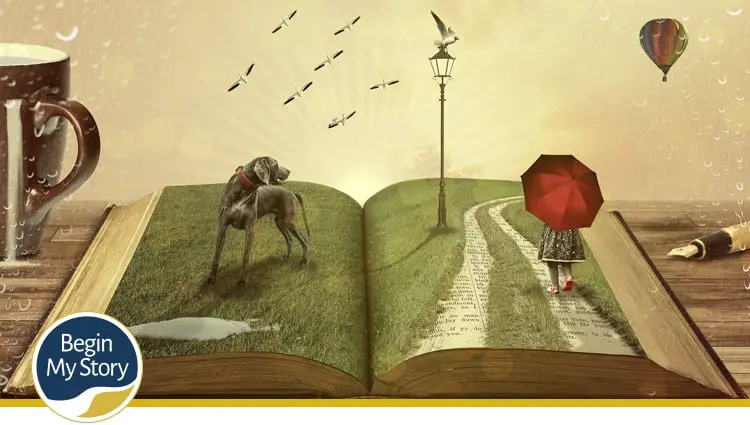
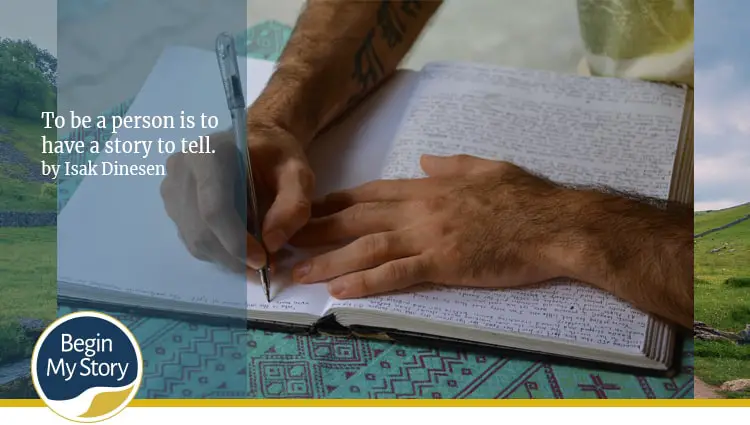
How to write, edit, and publish your personal story and family story.
will present what I have learned from writing personal, individual, and family narratives. This guide is based on my personal and professional experience in interviewing hundreds of people and writing thousands of narratives over the last several decades.
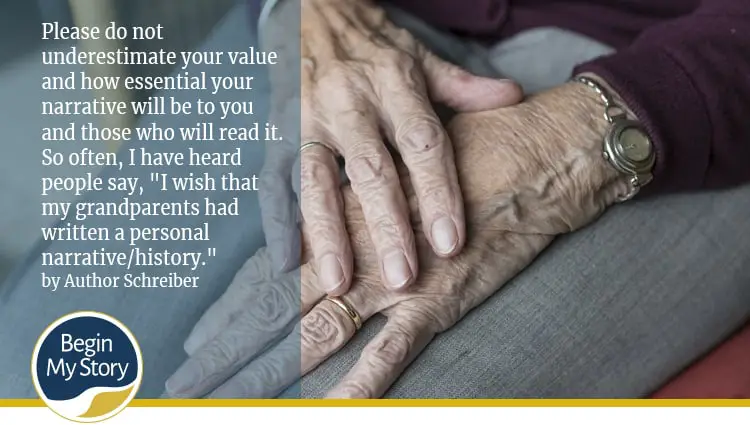
When I first started researching and writing a personal narrative—be it my own or about my mother, family, or others—I wanted to record the profound and thought-provoking experiences that could last for generations. Instead, I found the personal narrative of being about life and how choices determine our course and how our course provides us an opportunity to become the individuals we are and to create the legacy we leave with our ancestral lines. No matter how great or small, every story has value because life was lived, and every life is a gift. The story is about what we did with the gift.
In this “Complete Guide for Writing A Personal Narratives,” I will present what I have learned from writing personal, individual, and family narratives. This guide is based on my personal and professional experience in interviewing hundreds of people and writing thousands of narratives over the last several decades. The following are the topics that will be covered in this guide:
- A Story Worth Writing Begins with an Outline
- Use the “Mapping” Technique for Narrative Outlines
- Writing A Personal Narrative—Draft One
- Ideas for Writing the Paragraph
- Writing A Personal Narrative—Revising the First Draft
- Structure for Writing a Personal Narrative
- Support Your Claims in A Personal Narrative
- Include Artifacts, Photos, and Images
- Other Elements to Include in Your Personal Narrative
- How to Organize the Sections of Your Personal Narrative
- Publishing Your Personal Narrative
- Sharing Your Personal Narrative
Other resources to consider include:
- Complete Guide for Conducting Oral History Interviews
- 7,500-plus Questions About Life to Ask People When Writing Narratives
1. A Story Worth Writing Begins with an Outline

“Why do you need an outline? I already know what I want to say.” These are the words I remember saying in tenth grade as I started my English creative writing course. As I discussed the first writing assignment with my teacher, I assured her that I could finish the story without writing the required outline. She allowed me the opportunity to prove her wrong. After several drafts, I reluctantly told the teacher I could not complete the story in the assigned time. I found myself writing and rewriting. I found myself expanding and deleting sections of each paragraph. It was never wholly what I wanted to say.
The teacher offered me a second chance. This time, I was to use an outline and then write the story. With a new topic, I wrote the outline and finished the story. I don’t remember my grade, but I remember the lesson: a story worth writing begins with an outline.
An outline is a blueprint of your final product—in this case, your narrative. It represents the content of your story, organizing your memories, lessons learned, and supporting details. The outline is all about organization and providing a visual and conceptual design of your writing.
How does an outline help in writing a personal narrative?
The outline helps you expose gaps in your story early in the process and gives you time to fill them in, not to leave out any important events, stories, and ideas that you want to tell. You will understand the full breadth of the story you write, have a clear focus on the detail you want to include with each topic, and always have a reference point to add, rearrange, and delete.
Remember, the outline is a blueprint. Just as blueprints help a builder create a structure, your outline can form the foundation or frame for the first draft.
Writing experience by experience, topic by topic: If your outline is on a computer, you can just click your cursor at any part of the outline you have created and fill in the details. This can help you overcome writer’s block. That is, you can write the third section first if you want. Then simply go back and fill in sections one and two. When you revise, you can make sure all the pieces fit together.
Modifying the design
Outlines are not set in stone. As you write, you may discover that you’ve left out essential information. If you keep a printed copy of your outline handy, you can figure out where in your outline the new information belongs and insert it (don’t be formal about it—just pencil it in). That way, you can see how the addition alters the rest of the story.
Starting again
Sometimes your original outline simply needs to be restructured. If you are careful, this is not a problem, and you can rework the original outline. When you create the new outline (even if it’s simply a sketch), focus on your purpose and who you are writing to.
Using the outline to crosscheck the final draft. Finally, suppose you update your outline as you work rather than abandon it after being created. In that case, you’ll have a handy reference to double-check the organization of the final story. The outline can also provide your section headings and subheadings for a larger story and become the contents table.
What is the outline structure for writing a personal narrative?
Like any good story, a personal narrative has three sections: introduction, body, and conclusion. The outline is designed to indicate levels of significance using major and minor headings. You will organize your information from general to specific. For example, the general headings could be as follows:
- Childhood (0-11)
- Adolescence (11-18)
- Early Adulthood (18-25)
- Prime Adulthood (25-45)
- Middle Adult Years (45-65)
- Senior Adulthood (65-present)
And subordinate headings or topics could include:
- Memories of your children
- Community Service
- Health Record
- Physical Characteristics
- Social Life
- Religion
- Memorable World Events
- Military Service
- Education
- Vocation
- Counsel to Posterity
As you create your subheadings, ensure a clear relationship between the subheadings and their supporting elements. Consider the following example:
- Mary Schreiber Attends High School
- High School Attendance
- High School Activities
- Drill Team
- Sr. Prom
- Mary Schreiber Summer Work
- Picking fruit (Cherries, Peaches)
- Working at the Midland Cannery

The most important rule for outlining is to be consistent! An outline can use topic or sentence structure, which is explained below.
Sentence Structure
A sentence outline uses complete sentences for all entries and uses correct punctuation.
- Advantages. Presents a more detailed overview of work, including possible topic sentences, and is easier and faster for transitioning to writing the final paper.
Topic Outline
A topic outline uses words or phrases for all entries and uses no punctuation after entries.
- Advantages. Presents a brief overview of work and is generally more straightforward and faster to write than a sentence outline. Two simple formats seem to work well with creating an individual narrative outline—roman numeral and decimal. They are explained below:
Roman numeral
I. Major Topic
A. Main Idea
B. Main Idea
1. Detail of Support
a. Broken down further
(1) More details
(2) More Details
Decimal
1.0 Major Topic
1.1 Main Idea
1.2 Main Idea
1.2.1 Detail of Support
1.2.2.1 More details
1.2.2.2 More details
Regardless of simplicity or complexity, an outline is a pre-writing tool to help you organize your thoughts and create a roadmap for writing your narrative.
Remember, the outline is for you. It exists to help orient you within the individual narrative and to help ensure a complete answer. You can deviate from it if you wish, and as you write, you may find you have more and more ideas. Stop and take the time to brainstorm and write them down, then reassess and adjust your plan.
How do you create an outline for writing a personal narrative?
I have created a simple system for gathering and managing information when you are writing individual narratives. See the article, Easy 7 Step Color-coded File Organizing System for Writing Narratives.” If you have used the system, start with the first folder and move your way back through the folders. The system makes it effortless to create a personal narrative outline
If you didn’t use the system, start at the beginning and outline the significant events of your life. Start with your childhood years and continue through to the present. For example, the following is a very rough outline, using the roman numeral format, of the “childhood years” life stage for Mary Schreiber:
I. Childhood (0-11) (Years covered)
A. Birth
1. Detail
B. Death of Mother
1. Detail of Detail
2. Detail of Detail
C. Life with Uncle Dean and Aunt Janet
1. Detail
2. Detail
a. Detail of Detail
D. Remarriage of Mary’s Father to Step-mother
1. Detail
a. Detail of Detail
b. Detail of Detail
2. Detail
a. Detail of Detail
b. Detail of Detail
Some individuals prefer to pick topics or life stages and answer predetermined questions from each stage of life to help prompt them through.
Return to list of topics for Complete Guide for Guide to Writing A Personal Narrative.
2. Use the “Mapping” Technique for Narrative Outlines
Whenever I need a little bit—or a lot—of extra help developing ideas that I will write about, I use what is called “mapping.” Mapping refers to organizing your ideas visually by connecting one thought with another. Eventually, the mapping will lead you to a list of ideas and a sequence to use them in.
How to use mapping to generate ideas
Use these steps to generate ideas.
- Write the topic in the middle of the page.
- Draw lines that branch out from that topic to other keywords or phrases you associate with that topic.
- As needed, draw more lines that branch out from each of the keywords (subtopics) that help to develop these ideas.
- Now that you have created a few subtopics, evaluate which subtopics go together and can be linked, if any. Connect the ideas that work together with lines.
- If you need to regroup your ideas, write the topic in the middle of the page again and go through the first steps again with the new groupings.
- Continue this process as many times as needed until you can form the topic groupings into the parts of your story or experience. With the bubbles and branches, you can see how they interrelate and work together as a whole.
How to use mapping to sort out stories, experiences, or paragraphs
Use these steps to expand your ideas.
- Write your topic in the middle of a large piece of paper.
- Take your brainstorming list and circle the central ideas.
- Which of those ideas link to other ideas on your page? What would be the main idea? What would be subsidiary or linked ideas?
- Now transfer the main ideas to the mapping page. Draw a circle (bubble) around the idea and then link the ideas with lines, like tree branches.
- By connecting the ideas with branches, you show concepts and ideas interrelate. Continue to add bubbles and branches as the ideas continue to expand. Use lines and branches to show how any of the large or linked ideas interrelate. Don’t be afraid to add bubbles or branches that weren’t in your original preparation writing. Keep those ideas growing!
- When you have completed the exercise, you can see how the ideas fit together. Once you see how the ideas work together, you can list which ideas to use in your writing.
Return to list of topics for Complete Guide for Guide to Writing A Personal Narrative.
3. Writing A Personal Narrative—Draft One
By now, you should be ready to start writing. Whether you are writing about yourself or someone else, be honest. I have read many personal narratives over the years, and those with the most meaning include true stories about real life. The stories range from the sad and tragic to the exciting, funny, and simple day-to-day.
Gather your resource materials and find a place to write. Gather your outline and any other resource materials near you for easy reference. Now that you are ready sit down and start writing. When you open the doors of memory, you will probably be eager to capture everything just right. Sit in a comfortable place, relax, and take it one page at a time.
Write your first draft as fast as you can, without concern for style and grammar. You may think this contrary to practical writing style but write your first draft as rapidly as possible. The focus of the first draft is to put your thoughts to paper (or keyboard) as quickly as you can. Be yourself—you’ll write faster and more naturally. Don’t think that the first draft has to be perfect—you’ll probably think it’s awful, but if you worry about writing a great first draft, you’ll never finish.
Don’t spend too much time thinking about style and grammar; just write. Let yourself explore the ideas as you go. If you change your mind about saying something, don’t stop to cross it out; write an improved version. You may have a lot of repetition in your first draft. That’s fine. Only if you find you’ve veered far off-course should you revise what you’ve written before moving on. Otherwise, wait until the second draft to make changes in the first part of the book.
Where should you begin in writing a personal narrative?
Remember: you have an outline, so start wherever you like. Start in the beginning, middle, or end. Just start writing. Start writing with the intent of getting some ideas down on paper.
Use memory triggers
A memory trigger can be a question, photograph, letter, or a discussion with a friend with whom you shared an experience. Think about the times you have looked through the photo album and come across pictures and were able to experience a time past as though it was just yesterday. All your memories are still in safekeeping; it’s simply a matter of finding them.
Write your first draft in the way that’s best for you
If you are a good typist, you will probably use the keyboard. If you write longhand, you can write with pen and paper. If you have a computer and use voice-recognition software (like Dragon Naturally Speaking), then use this software to write your first draft. It is essential to write your first draft as quickly and efficiently as possible, focusing on the words but not the way you produce the words. Assume you will be revising anyway.
Use descriptive words
Think about the who, what, where, when, how, and why of each memory. Use your senses to help describe your stories. These details will help bring your stories to life.
Make a note of any ideas
One experience you will have as you write about one topic is receiving inspiration and ideas. Your thoughts will range from a new topic to add to the outline or a piece of information to add to a topic that you just finished. You may get an idea to call Aunt Peggy to ask a specific question or look for a photograph in the scrapbook. Whatever the thought, write it down or capture it electronically. When I am writing, I will keep a digital recorder (or a notebook and pen) with me not to miss those moments.
Bracket the to#ugh to write sections
Put brackets around sections that are tough to write or require further information. When you write your first draft, it’s common to either not has all the information you need or be stumped. You may be writing about a specific memory and think to put in a text from an obituary. Simply use brackets to denote that more information is needed and keep moving. For example, [Need text from Mary Schreiber Obituary] or [Need to confirm the statement made by Uncle George on Midland city project during Depression.] By using brackets, you will save a lot of time and keep your train of thought moving. When you move on to the revision phase of the writing, you can go back and work through the bracketed sections one at a time.
Need help writing?
If you are not confident of your writing ability, join a local or online writers group to learn about the craft of writing or take a writing class at a community college.
Return to list of topics for Complete Guide for Guide to Writing A Personal Narrative.
4. Ideas for Writing the Paragraph

Sometimes the paragraph you are writing doesn’t seem to want to flow. The following is a simple look at constructing a paragraph, which may help you grow your ideas and write better, easier paragraphs.
A well-written, cohesive paragraph communicates one complete thought. To organize your subtopics into clear, concise thoughts, the following outline of paragraph structure is helpful.
A paragraph begins with the topic sentence, followed by supporting details and ending with closure.
- Topic sentence. The topic sentence states the main idea of the paragraph. The topic sentence is usually the first sentence of the paragraph but can be in the middle of the end.
- Supporting details. Once you have the topic sentence, it needs to have supporting details, which can be explained, examples, stories, facts, or a combination of these things. The supporting details will develop your topic statement and show your idea.
- Closure. This is where you bring your ideas to a close and link your ideas to the next point or paragraph.
How can I p#lan paragraphs for writing a personal narrative?
You have plenty of ideas, you kind of know what to say, and you know the basic structure of your writing. What do you do now? You need to work out what goes where. Look at all your ideas and identify logical sequences. Consider the following points when planning your paragraphs:
- Choose the first idea. Choose which idea the reader should know first. If all of the ideas seem equally relevant, choose the one you feel will provide the best “hook” for the reader. Choose the idea that will bring your reader into the story and guide them to what you’re thinking and answer. Choose one that will pull the reader in and orient them to your thinking and your answer. Don’t put the most dramatic ideas first. If the idea is the most dramatic, you should build-up to it.
- Choose a second idea. After choosing the first idea, decide which idea should go second. Which one would naturally come after? Is there an idea that belongs to or is an extension of that first one?
- Save the explanation for last. If you have an idea that needs to be explained, save it until the end so that the sentences leading up to that idea can explain your meaning more clearly.
Making the actual plan
Here is a simple outline for planning a paragraph.
- Make a list of the order in which you want the ideas to flow. This can be as simple as one word for each idea.
- Look at your list and ask yourself if the ideas flow naturally. If not, rearrange your thoughts until you have a plan you like.
- Double-check that there are enough ideas written down to support your topic sentence fully.
- If you want a more detailed plan, include smaller ideas next to each idea (subtopic or heading). You’ll use these smaller ideas to expand your thoughts. Also, include any examples you may want to use.
Return to list of topics for Complete Guide for Guide to Writing A Personal Narrative.
5. Writing A Personal Narrative—Revising the First Draft

Your first draft is done—congratulations! That’s a good beginning. Now it’s time to revise and edit. The difference between a mediocre individual narrative and a tremendous individual narrative often comes in the revising and editing stage. I can’t stress this phase of writing enough! I have had the sad experience of writing and printing a newsletter, brochure, or flyer where thorough editing was not done, and an error (such as a misspelling) slipped by. No matter how great the work, a simple error is like a splash of mud on clean windows. Editing is like hoeing the garden: it may not be pleasant at the time, but the result is wonderful. It’s also much cheaper to catch the error now than after you have printed and bound your work.
Toward the end of my father’s life, he began to reflect upon his life and write his memoirs. He wrote well over one thousand pages in longhand. He desired to have his writings published for all of his family to read. As I read over the lines and pages, I found many beautiful stories, examples, and lessons learned, but the writing was very rough. I was willing to work with my dad to edit and prepare the writings for publication, but it was no use; he was adamant that the first draft is the way it should be because it was his story. The 1000-plus handwritten pages are now filed away and on my to-do list.
Plan on at least two edits for your narrative. In the first edit, concentrate on the organization and content. Is the story in the correct order? Did you include all the characters and events you intended? Is it clear to readers who these people are and why they do what they do? Flesh out the characters, descriptions, and dialogue (if you have included it).
In the second edit, work on grammar, punctuation, sentence structure, and transitions to polish the story. Edit the story as many times as necessary to make it the best you can, but realize that it will never be perfect. You have to stop editing your work and finish it at some point. You may not achieve the “perfect” individual narrative—there will always be something to add and tweak—but you will have the story you want. Remember, you can always add additional volumes. Complete the individual narrative and share it.
After you’ve edited the manuscript several times, ask other people to read it. A professional editor can make a big difference; if you plan to publish for an audience more significant than your family, professional editing is essential.
Who does the editing?
Editing is a team exercise. You will probably do most of the writing and editing and plan on at least two other people to review and assist with the editing. If you are not interested in or don’t have the skills for editing, then definitely enlist the help of others. Editors can also be for hire.
Consider using Grammarly
One of the tools I use to help me in editing is an online tool called Grammarly. Grammarly’s writing app makes sure everything you type is correct and precise and easy to read. Grammarly’s algorithms flag potential issues in the text and make context-specific suggestions to help with grammar, spelling and usage, wordiness, style, punctuation, and even plagiarism. Our software explains the reasoning behind each suggestion, so you can make an informed decision about whether and how to correct an issue. Grammarly is also easy to use. There is a free version and a professional version. I use the professional version and love it.
Three types of edits
During the revision and editing process, you will engage in the following three types of editing:
- Restructuring or reorganizing—this involves reflecting on what has been written and making significant improvements in the way parts fit together.
- Acquiring new information—adding photos, maps, exhibits, or further research on topics to understand better topics discussed or eluded.
- Sharpening—adding clarity by going over what is written and smoothing it out.
The Revision Stages Requires Restructuring and Reorganizing
Restructuring and reorganizing is the essential part of the revision stage. It requires that you step back and look at your writing with a fresh eye, as if you were a person fifty years from now, reading your narrative for the first time. The following are a few ideas that will help you in the editing and revising process.
Read your narrative aloud and make notes
One of the hardest things you will do as a writer is seeing your work from an outsider’s perspective. “Being too close to the forest to see the trees” is a good idiom to describe what is happening. When I read my writing, I have misspellings and usage errors that I simply gloss over or don’t see. When my wife edits my work, I’m surprised that I missed the errors she finds. I overlook many errors because I remember what I meant to say and don’t necessarily look at what I wrote. Three techniques will help you to focus on the words you have written.
Read your writings aloud at every stage of revision
Read what you have written aloud so you can hear the words. When I read what I have written aloud, I force myself to focus on what I am reading and the flow of my sentence structure. I will often catch grammatical errors or flawed writing styles when I read it aloud. When you first begin your revision, read through the whole draft of a section—start to finish—before revising the parts.

Print out a draft of your narrative before you start editing
If you wrote your first draft on the computer, print it out before editing on the screen. By printing out what you wrote, it is much easier, for example, to evaluate the lengths of paragraphs and overall flow. You can write directly on the draft, make notes, and list changes that need to be made. You can circle sentences and draw a line to where they might fit better. With a printed copy, you can physically note which passages sound weak, need more evidence, or could benefit from more examples.
Read your essay aloud with a pencil or pen in hand
As you read aloud, make notes about what you think might need to be changed. When you read the draft the first time, make notes in the margins. If you see spelling mistakes or grammatical errors, simply circle them so you can come back to them when you start your revision and editing.
Look at your writing through a reader’s eyes
When I first started writing, I became very defensive when someone edited or commented about the writing. I took it very personally. That “filter” was keeping me from seeing how others were receiving my writing. The editing and suggestions others made were minor, but they made a difference in how the writing would be received. Even if I disagreed with the recommendation, it gave me a chance to rewrite a sentence or paragraph and make it much more straightforward. Thus, when you read your writing, you must see the writing through the reader’s eyes. The following are a few techniques to consider:
Read as if you had no interest in the personal narrative
Read your writing from the perspective of someone who has no interest in what you wrote. Writing the personal narrative is something you care about. Your first draft is essentially writing to yourself. It’s easy to skip essential facts simply because you already know them. When you read your writings from the point of view of someone who has no interest in the subject, you start asking questions or making comments—”Where’s the proof?” “That’s a lame statement.” “Why is that important?” “What was the date?” “What was it like to live in the city at that time?” You can more easily see any omissions, and this process gives you a direction of what to do to strengthen your writing.
Read your writing from the perspective of a doubter
Our personal narratives are filled with experiences that are personal, spiritual, and sensitive. When you read your writing from the perspective of a doubter, you find areas where you can add more proof and expand on details. If you wrote something negative about someone, when you read as a doubter, you take on the opinion of defending the person who was not shown in the greatest light. I have found myself “toning down” or simply leaving out my own opinion in some instances and instead just presenting the facts.
Have someone who will give you honest feedback read your writings
The two techniques above are based on you pretending to be the audience. This technique focuses on giving your writing to someone else and having them give you honest feedback. The first level of feedback that is most important is their reaction to your writings. Were they bored? Intrigued? What did they like the most and why? What do they wish you would have expanded on or simply left out? When you ask people for their genuine, honest feedback, do so to understand that you will take their feedback seriously. You may disagree with what will be said, but you will listen, not be offended, and view it as an opportunity to write a grand individual narrative that generations will cherish.
Return to list of topics for Complete Guide for Guide to Writing A Personal Narrative.
6. Structure for Writing a Personal Narrative

Your first draft was an exercise of getting your thoughts on paper. One of the first tasks you will address when reviewing your writing is to look closely at the body of the personal narrative and decide if the reader will see and follow the flow. An excellent narrative is not simply a collection of good paragraphs; it doesn’t start and stop at random—it moves in one direction. Good structure comes about through restructuring—moving, deleting, and adding sentences, paragraphs, or even whole sections. When you focus on the structure of your writing, you are not too concerned about transitions before and after the paragraph or even about detail in spelling and grammar because you’re not sure if that word, phrasing, sentence, or paragraph will even be in the final draft.
Reorganize and rewrite personal narratives from the top down
Look at the overall organization of your ideas first, and then work your way down to the details. If your paragraphs need to be moved around, settle on the order, you are going to put them in before you rewrite them. If you need to add new material, decide where it will go before writing it. Do not waste your time revising and inserting sentences until you know where every paragraph for a section of your narrative belongs. It is easier to start revising by inserting a sentence where you need one and correcting errors in your paragraphs.
Look at how the main parts of the body are connected
Whether you developed an outline or simply started writing, look at your writing to see how the information flows. One way to analyze the flow of your writing is to write down the topic sentence and see how the information flows and holds together from one topic to the next. The main task of this exercise is to see if your paragraphs are in good order. Does one paragraph lead to the next, or do you seem to be jumping around? Are you missing material? Are questions left unanswered?
Look at the way your paragraphs begin and end
Once you have the overall flow of your writing figured out, then examine your paragraph transitions. Does one paragraph lead to another? Are you answering the questions that were discussed in the previous paragraph or providing needed information? Or are you just changing subjects at random? Look for accidental or unintended breaks in the flow that are distracting and confusing for the reader.
Look for gaps
Look for those places where your thoughts seem to jump from one point to another without linking information. As a researcher, I find that I left gaps in writing when I chose not to explain or expand an idea that I already understood and knew the background information for. I have to remember that my reader doesn’t know the detail behind the story and that I need to include the information to have the same understanding that I have gained.
Return to list of topics for Complete Guide for Guide to Writing A Personal Narrative.
7. Support Your Claims in A Personal Narrative
When writing a personal narrative, most individuals will take your word on what you write concerning experiences and stories or about instances that are “common knowledge.” If your narrative is engaging, you should tell the reader something they don’t already know. When you write about other people, you will need a backup—beyond your word—to help develop and support what is being said. This type of backup would include newspaper articles, photos, certificates, letters, and history books. Evidence is information that tells how you know about the claim you have made. It would help if you took this very literally. It is often hard to tell the difference at first between telling readers what you know and telling them how you know it. A compelling narrative is credible by the answers you give, both about what you know and your sources for that knowledge.
Discover what claims in your personal narrative need supporting evidence
It is fair to assume that readers will accept claims about your own experiences—assuming they sound reasonable—without further evidence. If you make a claim that is not common knowledge and is not from your own experience, it requires that you add supporting information. As a researcher, keep in mind that not everyone knows everything you know.
Tell your readers how you know the claim is valid
Your narrative is devoted to answering the question, “How do you know?” When revising your personal narrative, take that question very literally. It would help if you let your reader know why you believe a claim is valid. This can be done by letting them know what you saw, read, or heard. If you believe that a claim you are making is valid, let your readers know what you saw, read, or heard that convinced you it was true. Sometimes you are going to have to do further research to confirm what you believe to be true. The following are a few examples of ways I have told readers how I know something to be true:
- The experience is based on personal experience. Tell your experience in a way that your readers will understand how you learned what you know. When I wrote about my mother’s physical abuse during her marriage to my father, I described what I observed. If I were to make the statement that my father abused my mother, there would be no reason for the reader to accept my statement or conclusion.
- The experience you relate is not your own direct experience. When you write a personal narrative, many of the experiences you relate will be those shared by others in oral or written format. Simply tell the reader how you found out about the experience and how it illustrates your point and how you found out about it.
- The experience and claims you are making are about a larger group of people or a family. If you are making claims about a group of people, it is essential to provide more than one experience to support the point you are trying to make. For example, if I were to claim that my Schreiber ancestry came from a rich history of raising cattle, I would then show examples of how members of the Schreiber ancestry raised cattle from several generations, gather proof of brands, articles from newspapers, photographs of the family with cattle, and so forth.
Explain your sources and cite them where necessary
To tell us how you know something, you need to tell us where the information came from. If you observed the case you are telling us about, you need to tell us that you observed it, including when and where. If you read about an experience, tell us where you read about it. If you accept the testimony of another person, you need to tell us who the person is and why or how she has the information you are providing.
Remember, the question your readers will always be asking is whether what they are reading is accurate. Your narrative will be a compilation of your personal experiences and those of others. You are always answering the question, “How do you know?” When you tell the experiences and stories of others, you are answering the question, “How do they know?” If you care about the truth you are writing about; readers need to have some way to check the reliability of your sources.
Use examples
The easiest—and usually the best—way to keep your readers interested in your writing is to use examples. All other things being equal, examples are more entertaining and involving than generalizations.
In almost every case, what readers remember best from an individual narrative is an example, usually a detailed and fully developed one. In such an example, we see and hear something that happened; it shows us people (or animals or machines) acting as we see them act all the time. When I read a detailed example story, it’s like being there. It relates to a personal experience that I haven’t had but that I might have had if I had been in the right place at the right time.
Dates and places don’t have to be dull
You can increase the interest in dates and places by adding a short description. Rather than saying, “Grandpa Jones had an eighty-acre farm,” you could say, ” When he was just 25 years old, Grandpa Jones bought an eighty-acre farm located four miles from town, next to the Spanish Fork River.” Dates can tell stories, but few readers will stop to notice when they are used without the description. When you have an important day you want to draw attention to, add definition. For example: “At the age of 32, his wife died from a black widow bite, leaving him four small children under the age of 7,” or “At the age of 17, just three months shy of his eighteenth birthday, he joined the Navy as a radioman at the beginning of WWII.” These phrases are much more interesting than “His wife died in 1933” or “He joined the Navy in 1942.”
Return to list of topics for Complete Guide for Guide to Writing A Personal Narrative.
8. Include Artifacts, Photos, and Images
As you write, edit, and prepare your narrative for publication, you will continually refer to or want to include images in your writing. The following is an overview of the types of artifacts, photos, and images you will want to consider in helping to write and tell the individual narrative.
How do I used photos and scanned images for my personal narrative?
As part of preparing your writing for publication and distribution, adding photos and scanned images is a critical consideration. What images will you choose to help tell the story? In addition to photos of people, including photos of significant buildings or other locations, including homesteads, churches, family cemeteries, or places of business. Images of certificates (such as birth, marriage, and death certificates), letters, and other personal documents will add significant value in telling the individual narrative.
I have found that the most challenging part of using images is choosing which one to use. It is a common desire to use as many images as possible, but you should choose the best images to help you tell the story. If you are talking about a family, try to find a photo of the family rather than individual photos of each person. Consider the following list of suggestions when choosing images for your narrative:
- With your digital archive or paper archive, you created such as the one I introduced in the article, “Easy 7 Step Color-coded File Organizing System for Writing Narratives,” in front of you. Review each folder about your written story. I have organized and sorted all my images into electronic folders that match the physical paper organization I have created.
- Place a sticky note on each photo that fits the text of the personal narrative you have written. Mark on the sticky note the section title and paragraph you believe the image would be suitable for.
- Review each item you have tagged with a sticky note and ask the following questions:
• Would I find that valuable item or interesting if it were in someone else’s narrative?
• Would it be as effective to describe the item rather than include it in the book?
• Is the item representative of the period in which it will be included?
Note 1: If the answer to any of the above questions is “no,” remove the sticky note and place the item back into the narrative archive. Only those items with a sticky note will be considered for use in the final, personal narrative.
Note 2: If you are using photos of persons who are still living, it is essential to gain their permission for use.
Note 3: At no time is it permitted to include vital record certificates (birth, marriage) or any related types of records of living persons.
- Choose the best quality and most typical images to use in the narrative. Often you won’t have the opportunity to choose the photo because it’s the only one you have, but if you do have a chance, consider the following when choosing photos:
• Get Close. Choose photos that get close. Photos, where the subjects fill the frame with only the most basic image, are just better.
• Are Not Centered. Choose photos that do not have your subject right in the center of the photo. Photographs are uninteresting and static when centered, so having an un-centered photo lends more interest to the subject.
• Aren’t rushed. Choose from photos where you have a series to choose from. You can choose where the photo will be on the page and then look for the one that best fits the space and is composed well.
• Explore all angles. Choose photos that give you a change in perspective (such as a photo shot up from an angle or down from a higher angle). The photos help eliminate distracting backgrounds, telephone poles, or other obstacles that would otherwise negatively affect your photo.
• Focus on the eyes. If possible, choose photos that have the subject looking directly at the camera. There is nothing more inviting than looking into the eyes of our friends and loved ones.
• Use the richness of the sunrise and sunset. Some of the best photos are taken during the first and last hour of sunlight each day. During these times, the light is warm and soft, lending a beautiful quality to the photograph. Choose photos that are taken during these hours.
• Shoot photos on overcast days. Photos taken on overcast days are great to use because you don’t have harsh shadows, and the colors are overall better.
• Don’t use direct flash. Choose photos taken without flash. Direct camera flash often causes flat lighting and red-eye.
• Use window light. Choose photos that take advantage of soft, natural light.
• Don’t have the midday look. Midday photos are among the worst photos because the sun is bright, which creates harsh shadows on faces and objects, squinting eyes, less appealing skin tones, and overall muted colors.
- Stay away from the scrapbook look. This is where you trim images and documents with special cutting scissors, add stickers, and write on the photo or any related activities. While it might look cute, it simply destroys the artifact and is not seen as providing any real value to what you are trying to display. Instead of scrapbooking your artifacts, spend your time writing a good and descriptive caption.
- When you have more than one photo for a specific section, and you can’t decide which one to use, ask others for their opinions about your final selections.
Can I use maps, documents, letters, and other artifacts in my narrative?
In addition to photographs, you can effectively use a wide variety of artifacts to help expand and bring meaning to your writings. For example, you can do the following in your personal narrative:
-
- Maps. Use maps to show current boundaries for counties, states, or other areas and the boundaries that existed when your family lived there. Use a map to show the migration path of your ancestors. Use different styles of lines and a legend to show historical and current boundaries and routes of migration. When using photocopies of actual historic family documents, also include a typed transcription.
- Grid Format. The use of documents and maps usually fits into the same grid format (explained below) for your photographs.
- Drawing and handwritten documents. In addition to historical documents, you may find it valuable to include drawings or handwritten stories from youth, as well as newspaper clippings or notations about current activities of living family members.
- Blank pages. Add a few blank or lined pages for future family members to make additional notes as the family grows.
- Scanned signatures. Scanned signatures (taken from wills, letters, and so forth) placed next to photographs can be an excellent addition.
- Note: Any works published more than seventy-five years ago are no longer covered by copyright so that you can use the pictures, but you should give credit. Be aware of copyright issues when using maps, illustrations, and other materials that are not your own.
What image layout should I use for my personal narrative?
As you begin to combine your writings with images, the following lessons that I have learned will help improve the layout and readability of your narrative:
-
- Develop a layout grid for your narrative. A layout grid denotes where you will put images and text on the pages to help maintain visual consistency throughout the book. Where possible, place photos near the text (narrative or charts) describing the individuals in the picture. Accompany narratives with photos of the key people in that story.
- Group photos from the same branch of the family tree on the same page or group of pages.
- Create a photographic timeline, such as a series of group shots from family reunions taken over successive years. For example, pair a wedding photo of a couple with a photo from their fiftieth anniversary.
- Enhance an otherwise dull chart with a headshot of the “head” of each primary branch of the family.
- Instead of an initial drop-cap (a large, two- or three-line tall capital letter at the beginning of a chapter), place a photo at the start of a narrative rather than placing it “tombstone” style over the top story.
How do I prepare photos and images for my personal narrative?
You will most likely be using digital images in the final preparation of your personal narrative. Take the time to enhance your photographs using editing software. The following are a few thoughts about photo editing. I encourage you to seek more detailed how-to advice for your specific needs.
Remember. Your original photos are your negatives
Never make changes to these—always work with a copy of the photo. When you load a photo into your image manipulation program, always do a “save as” to make a copy of the photo, and then work with that copy. If you make a mistake, you can always go back to the original and try again.
What to do with photo-editing software
The most common photo-editing tasks you will perform include the following:
-
- Reassemble large documents that have been photographed in sections.
- Correct the effects of poor lighting conditions or remove shadows from your photos.
- Compensate for distortion of the document photo caused by a poor shooting angle or curled pages.
- Enhance the quality of document photos suffering from low contrast or hard-to-read text.
An example of editing a document
Below I’ve outlined the steps I go through in editing an image with poor lighting. This is a simple process that has worked well for me. (I use Adobe Photoshop or Elements.)
- Import image.
- Create a duplicate image.
- Rotate image, if necessary.
- Use a cropping tool to trim the image.
- Use an auto level, auto color, and auto contrast. Use the manual versions of these tools if needed.
- Save as a new file with a different name.
Return to list of topics for Complete Guide for Guide to Writing A Personal Narrative.
9. Other Elements to Include in Your Personal Narrative
Where you are writing your personal narrative, there are no limits to what you can include. For example, you can add
Ancestry or family tree charts
Ancestry charts show family relationships. Careful consideration should be used when deciding to include them in your narrative because they can take up too much space, or their format might not fit the book’s layout. Most individuals will start with a common ancestor, show all descendants, or start with a current-generation and show linkage to the common ancestor. Charts do not have to be extensive. A two- to the five-generation chart can be an excellent addition. There is no right or wrong way to include ancestry charts, as long as they fit the format of your book. As a rule of thumb, use standard, commonly accepted genealogy formats. While genealogy publishing software may automatically format charts and other family data suitably, when formatting data from scratch, consider these tips:
-
- When listing generations and descendants, it’s a good idea to indent bullets and numbering because it makes the information more readable.
- Use the same formatting throughout the book when listing dates such as birth, marriage, and death.
- When continuing information to another page, end on one individual and start the next page with a new individual.
- Be consistent with the way you connect family lines with boxes and lines.
Chronology sheets
These sheets allow you to detail, in date order, the schools you attended, the jobs you have had, homes you’ve lived in, and so forth, as well as any other details you may wish to include. Remembering exact dates can be difficult, so indicating the year is usually sufficient.
Dedication. You may have decided before you start writing your narrative to who you want to dedicate your work. I would advise that you wait until you have completed it until you decide. Working on your narrative will stir up many old memories, feelings, and emotions, and you may change your mind about your dedication by the time you are finished.
Documentation
The first rule of genealogy is to document your resources. Should you use documentation in your narrative? Many prefer not to use footnotes or endnotes because they find them distracting. However, I believe that you should include documentation in your narrative.
You include documentation because it provides the reader with important information about your source and credibility in your writings. If readers have conflicting information, it becomes easy for them to compare their notes with yours and correct their data. When you talk about families and what they did or did not do, having the source of information makes the truth easier to understand. When you expand your research about separate topics, you give readers a place to go for further reading, such as a book, website, or article. Documentation will save you a lot of argument and time.
Epilogue
Once you have completed writing your narrative, take some time to reflect on the completed project. Write down your thoughts and feelings about the experience in an epilogue.
Preface
A preface is a place for you to put a few of your thoughts before you start your narrative, such as why are you writing your autobiography, what you hope to achieve by writing it, what you hope others will get out of it, any worries, fears or concerns about reliving the past, and so forth.
Index
The index is an essential addition to your narrative. An index provides the listing of where to find mentions of topics, people, and images. If you are using a genealogy program to assist with the production of your book, you can also do indexing or use your word processing program to develop and edit it.
Note: It’s a good idea to index a woman under her maiden as well as married name.
Table of contents
Next to the index, the table of contents is a necessary element of your writing. The table of contents helps others understand how the writings are organized and provides a map of your work. Use the table of contents to show general sections, such as chapters and subheadings.
Vital statistics
A listing of your vital statistics—such as your name, address, and age—is the information needed to identify the work as your own and serves as a point of reference later on. Anyone who reads your narrative will also know who the writer is.
Return to list of topics for Complete Guide for Guide to Writing A Personal Narrative.
10. How to Organize the Sections of Your Personal Narrative

The following is an example of organizing your narrative into chapters and sections for a cohesive presentation.
Title page
This is the first page after the cover, and it contains the title (and sub-title) in as few words as possible. It may also include the edition number if there is more than one edition. The title page is the place to list your name and the names of other authors and editors, as well as the place and date of publication.
Copyright statement. The copyright statement is usually on the back of the title page. It includes information about the publication, such as the publishing date and who to contact for more information.
Example: Copyright 2021 by Author B. Schreiber. All rights reserved.
Table of contents
This is a list of chapters and sections with accompanying page numbers. It provides an outline and guides for readers to find sections that are of most interest to them.
Dedication
The dedication contains the person or people to whom you are dedicating the personal narrative and why. It is usually written on the page after the copyright page.
List of illustrations
This contains the name and page number of each picture, map, or illustration in the individual narrative.
Foreword
A foreword is a statement about the personal narrative written by someone other than you or the editor.
Preface
This statement, written by you, describes why you wrote the personal narrative, provides an overview of the personal narrative’s scope, content, and organization; and outlines the research methods you used. It also provides an address for readers who wish to contact you.
Acknowledgments
An acknowledgments page is a place to show gratitude to people or institutions who helped you research, compile, edit, or otherwise put together your narrative.
List of abbreviations
This reference contains the abbreviations you have used in your personal or family narrative and their meanings.
Introduction
An introduction contains background or historical information that may be needed to understand the personal or family narrative.
List of contributors
This lists the names of people who helped write the personal or family narrative.
Chronology
A chronology provides dates and descriptions of important events in a personal or family narrative. It gives readers an overview of the events that shaped the person’s life and provides a quick reference to critical events. Including a chronology is handy if your history is not arranged chronologically.
Main body
The main text of your narrative is usually divided into several sections or chapters and can also be divided according to the period. You can use divider pages to separate the chapters. The text may contain footnotes, endnotes, and so forth, as well as illustrations, photographs, maps, or copies of records and certificates.
Appendix or appendices
An appendix contains information that is not essential to the main body of the text but may be helpful to readers who want more specific information about a topic. An appendix can also list the sources used in writing your history.
Examples
Family group sheets, pedigree charts, and similar items
Bibliography. A bibliography lists the sources you used in compiling your narrative.
Index
This list of individuals, place names, and subjects mentioned in your history, with page numbers of where the topic is mentioned.
Return to list of topics for Complete Guide for Guide to Writing A Personal Narrative.
11. Publishing Your Personal Narrative
When writing your personal narrative, there are many options of how to publish the narrative. However, before you start talking about publishing, you need to ask yourself a few questions, such as the following:
How good is my material?
-
- How thorough has your research been?
- Are you satisfied with the accuracy of the information you have acquired, and have you documented your sources?
- If your research contains hypotheses or conclusions that are based only on conjecture, are you willing to state them as such? This will help other researchers put your work in context and, hopefully, encourage additional research.
- If there are gaps or questionable data, you should probably conduct additional research to make your publication the best it can be.
Does the information present a cohesive picture of the family?
-
- Are there significant chronological gaps in your research, missing individuals, or missing important dates?
- Do the family stories relating to historical events fit with documented historical facts? Can you prove them?
Are you a good writer?
-
- You may want to enlist the writing or editorial assistance of someone good with words, sentence construction, punctuation, and writing engaging text.
Are you sure you want to share your research with others?
-
- Suppose you plan to publish material on the Internet (see below). Are you ready to extend your research range and invite other researchers and family members to contribute more material or challenge your publishing?
- You are always sure to receive feedback in some form or another. If you receive corrections to your data or additional data, are you prepared to publish a revised edition of your work?
All of these issues influence your decision about when to publish. As you proceed with the desire to publish, you will have multiple options for publication, including the following formats:
Blog
Individuals will sometimes use a blog to publish their narratives or the narratives of their families. The format is much like that of an online journal. The process of posting to a blog is relatively simple. It becomes an easy and inexpensive way of sharing your personal narrative. A typical blog includes the following elements:
-
- Short, informational entries—generally arranged in reverse chronological order
- A time or date for each post
- Links to other blogs or websites for additional content
- Archives of all previously posted content, sometimes arranged into categories
If you decide to use a blog to publish your personal or family narrative, focus on telling stories about individuals. You can include photographs, video, audio, and scanned images such as a newspaper article or letter. You can organize your posts into individual or family groupings. Include your documentation where appropriate. If you are in the process of researching a family line, you can tell the stories as you discover them.
Family newsletter
Family newsletters usually focus on happenings of the family that is usually spread far and wide. Many family newsletters also become a medium to share family narratives and include documents, stories, photos, and newly discovered facts with all interested researchers. Newsletters are usually published two to four times a year by printing, photocopying, or electronically posting.
Family narrative thumb-drive, CD or DVD
A family narrative thumb-drive, CD or DVD can hold large amounts of data in a small space. It can include photos, sounds, scanned document images, and even video—something a printed personal or family narrative can’t do. And since they are compact and relatively inexpensive, you can easily share them with other personal or family narrative researchers at family reunions, genealogical conferences, or through the mail. One of the biggest challenges in creating a family narrative thumb-drive, CD or DVD is to decide what information you’d like to present and how to organize the information. Suppose you’ve spent years studying the genealogy of a particular family or surname. In that case, you probably want to include the results of that research in the form of lineage-linked family trees or register reports. You may also want to include a written family narrative or photographs of your ancestors, their houses, headstones, and so on. Or perhaps you have video or sound recordings of ancestors or family members you would like to showcase.
What are my options for printing and publishing my personal narrative?
Of all the options, printing and publishing is usually the first option you consider when sharing your research and personal narrative. Self-publishing your personal narrative is a relatively simple process with the available technologies. Options range from a simple printout of a word-processing document to a book layout in a desktop publishing program. If you chose to do a book layout, you can then print your book at a quick-copy, bind it with a spiral ring, or print at an offset press and have it professionally bound. You can print a few copies and distribute them to a few families or publish and sell many copies to the public.
Google search
I would encourage you to do a Google search on “How to self-publish a person narrative or history.”
The following are a few lessons learned by others about publishing their narratives with publishers.
Quick copy versus book publisher
If you plan to print under two hundred copies, you are probably better off going to a quick-copy, although specialty publishers take on “short-run” projects. Most commercial publishers prefer a print “run” of more than five hundred books. Printed books are usually well designed and of good quality.
If you’re publishing a few copies of the book for your family only, you can lay the book out in a word processor and have it printed at a local printer or even print the pages on your home printer and insert them in loose-leaf binders.
If you’re publishing for a wider audience, you’ll need to hire professionals for the interior and cover design and printing. You can contract with individual vendors for the various services you need or hire someone to handle everything. Be wary of publishing companies that charge you hefty fees to publish your narrative and then purchase the book copies. Check the credentials and references of professionals you use and interview them to ensure you’re comfortable working with them.
Talk to publishers before you start. Start talking to publishers when you start writing a personal narrative. They will help walk you through design and formatting options that will affect what you write and format.
Review other personal narratives to gain ideas
Take the time before you start writing your book to browse through other personal or family narrative books to see how others have done it. Photocopy pages from the book you like so you have them as a reference when planning your book. Factors to consider include the paper type and quality, print size and style, number of photos, and binding. A little extra time and money can go a long way toward making your book as attractive as possible—and keep it within your budget parameters.
Compare costs. Call a few potential publishers and printers to compare costs and quality of service and find out their requirements for publishing a personal narrative. To obtain an estimate for a whole life story, plan for a book of two hundred pages, including images, with enough copies to distribute to your parents, siblings, children, and grandchildren (and a few extras). If you want to be more exact, provide the publisher exactly how many pages are in your manuscript. It is always a good idea to take your finished manuscript with you, including the mockup of picture pages, introductory pages, and appendixes. If you want to spend more, you can have your narrative printed by an offset publisher. The quality will be better, but the high additional cost may not justify the additional quality.
How to fund publishing
It is unnecessary to spend a lot of money completing a personal narrative, but it should look good and read well if you are going to do it. It’s not uncommon for individuals writing family narratives to have the total project funded by family members, provided you are doing the work.
Ask for samples
Ask your publisher to see samples of the types of binding they offer. Most publishers will show you a variety of bindings. Having your narrative hardbound with a sewn binding is not a requirement; however, it will last longer than other types of binding. Your goal is to publish and distribute your narrative, regardless of how it is bound.
Work with the publisher
If available, have your publisher archive your narrative for you. Many publishers will offer a one-time storage fee and keep it for you in digital form, which you may use later to make additional copies.
Use electronic files
Use a publisher that prints copies from a file you’ve saved to on your computer. Each copy will then be as good as the original. Contact your publisher to find out what file format they prefer. Most publishers will accept files in recent versions of Microsoft Word, Corel WordPerfect, and other widely used word processing programs. Extra care should be taken to ensure that the end product is acceptable and correct.
Paper makes a difference
20 lb. paper is acceptable (but too thin to print on both sides of the page), but 24 lb. is better and 60 lb. is best. Double-sided printing is preferable. The standard paper will discolor and become brittle within fifty years, so always have your narrative printed on acid-free paper.
Black-and-white photos are best
All photographs and images should be copied into black and white images. Black and white images will preserve much longer than color images, and printing black and white images is much cheaper than printing full-color photos.
Layout considerations and options
There will be many details to remember when defining how your narrative will appear on the page. For example, you will need to think about the book’s size. The standard paper size is 8.5 by 11 inches and will be the most cost-effective to duplicate. Smaller page sizes may be more attractive but will require more pages and will be more expensive as the pages will have to be cut to smaller. Other layout considerations include the following:
-
- Stay away from trying to use a fancy-type face. Use fonts like Helvetica, Times New Roman, Arial, or members of serif text families. These fonts are easy to read.
- It’s always a good idea to use a large face such as 10 to 12 point types with average margins for one or two-column formats.
- When you align your text, you can justify your text (aligning your text on the left side of the page with a ragged right) or justify the text with a flush left and right.
- There are many different types of binding available for your narrative. Search the one that best fits your budget and at the same time fulfills the purpose you have in mind for the book.
- Remember, you must make the side you will bind to be V4″ more significant than the outside edge when you are laying out the page. For example, your binding edge will need your binding edge if your outside edge is V2″ 314″ wide.
- Take great care in writing the captions in your book. For example, try to the best of your ability to include the name of every person in the photograph. When you have large groups of people and cannot identify everyone, give the photo’s date.
Return to list of topics for Complete Guide for Guide to Writing A Personal Narrative.
12. Sharing Your Personal Narrative

Throughout the writing of your personal narrative, keep your eyes focused on the completion and distribution. The following are a few ideas to consider:
Publish several extra books for future generations. Posterity should have easy access to your narrative.
-
- Sell it.
- Donate copies to libraries or other institutions.
- Post it on the Internet.
- Donate a copy to your local library.
- Donate a copy to the Salt Lake Family History Library.
- Permit microfilm using the Family History Library’s “Permission to Duplicate” form.
- Send a letter of permission with your manuscript.
- Send an unbound copy as it’s easier to microfilm.
- Plan ahead for the publishing and marketing of your book.
- Be alert for contacts and opportunities for promotion as you research and write.
Keep good records of anyone who has been contacted or helped with the book. You will contact them as potential buyers or persons who will help publish and distribute the personal narrative book.
When I first started researching and writing a personal narrative—be it my own or about my mother, family, or others—I wanted to record the profound and thought-provoking experiences that could last for generations. Instead, I found the narrative of being about life and how choices determine our course and how our course provides us an opportunity to become the individuals we are and to create the legacy we leave with our ancestral lines. No matter how great or small, every story has value because life was lived, and every life is a gift. The story is about what we did with the gift.
Return to list of topics for Complete Guide for Guide to Writing A Personal Narrative.